Exposure compensation: Asserting your vision
If you rely on your camera's automatic exposure metering, manual exposure compensation can offer you some level of control over the outcome of this highly obscure process. In general, it allows you to override the standard behaviour of your camera which is designed to be good enough for most of the time – but is rarely ideal for the situation at hand.
You may want to rotate your phone in order to improve your browsing experience on this site.
How to get it work
Cameras enabled with exposure compensation will provide a dedicated control for its configuration, normally situated on their top panel. Looking as a round dial, or wheel, it will allow to add or subtract the specified exposure value to or from that calculated automatically by the camera.
Most cameras will offer manual compensation on the scale from -2 to +2 EV, sometimes from -3 to +3 EV, in ½ or ⅓ EV steps. Negative compensation values result in lower overall exposure, darkening the image and mitigating blown highlights. Positive values, on the other hand, cause higher exposure, lightening the image and highlighting impenetrable shadows.
When to use exposure compensation
As mentioned in the discussion of different metering modes, I strongly recommend using some variety of average metering for your landscape images. Chances are, your camera will offer centre-weighted, or integral as it is sometimes called, metering.
This mode evaluates the light from a large area of the image, giving more significance to the values in the middle of the frame. For scenes with uniform lighting, it's often far superior to the default multi-zone metering. The latter's predefined evaluation points deliver rather random readings highly dependent on the exact framing.
In contrast, variants of average metering deliver consistent exposure values in unchanged lighting conditions. This makes it easy to compensate for camera shortcomings due to any reasons whatsoever, as the measurements stay constant as long as the lighting does.
You'll know you have to compensate
- if your image turned out over- or underexposed. This is obvious – just try to counterbalance your camera's bias
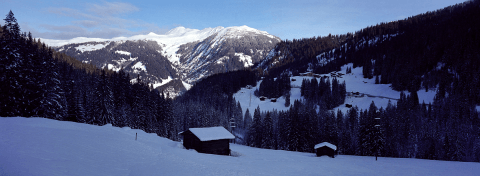
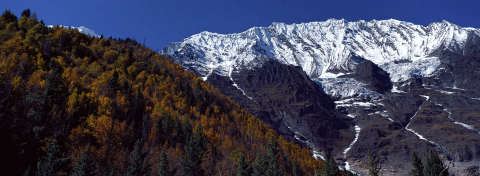
- if your subject is in front of a bright background, e.g., sunny sky, snow, or sand. Underexpose by ½ to 1½ EV
- if you work with film and are going to scan your images, especially when using print film. Underexpose by ½ to 1 EV
- if your subject is in front of a dark background, e.g., stormy sky. Overexpose by ½ to 1 EV. This is probably the only situation you'll ever need to overexpose when dealing with landscapes.
I normally underexpose by ½ EV no matter what.
If in doubt: Exposure bracketing
In general, using manual compensation to underexpose is safer, as you can always push an underexposed image in postproduction to achieve a satisfying result. You won't be able to do the same with an overexposed image: detail in blown highlights is lost forever and beyond recovery.
If you don't want to leave anything to chance or don't have the time to experiment with several compensation values, use your camera's bracketing option. With this, the camera will take several images with different exposure values offset by a predefined amount. One of the images will be exposed according to the automatically calculated reference value. The other 2, 4 or 6 shots will be divided in two sequences of equally under- and overexposed images.
The total number of images in the sequence as well as the exposure difference between them can often be configured. With 7 images set apart by 1 EV, you can get a range of exposure values from -3 to +3 EV compared to the automatic exposure. This should give you enough room for possible mistakes of your camera. Just don't forget to set it on a tripod.
My XPan can produce sequences with 3 images offset by either ±½ EV or ±1 EV.
Exercise
Take some images with manual exposure compensation or using exposure bracketing function of your camera. Get a feeling for automatic exposure calculated by the camera. Practise to decide on compensation value before pressing the shutter release.
Tags: #exposurecompensation #cameraexposure #photographylessons
Other articles on camera exposure
- Aperture and depth of field
- Learn what aperture is, and how its different settings can change the look of your images.
- Shutter speed and motion blur
- Learn how exposure time can add dynamic and movement to your images.
- ISO and digital noise
- Learn how photo noise is related to your chosen ISO value.
- Metering modes
- Understand different metering modes and when to use them.
- Exposure compensation and bracketing
- Learn how to overcome shortcomings of your camera's automatic exposure metering.
- The sunny 16 rule and manual exposure
- Measure up to your camera and take exposure in your own hands with this simple and easy to follow rule.
Tell me what you think!
Is it useful 👍? Awful 👎? Leave a message! Your comments help make this site better (and give me a kick—one way or another).
Popular articles
-
A kind of magic
If a digital picture has to be seen in the real world, printed on a real medium and displayed in a real showcase, its transition from RAW to real is better done in an old school image editor. Enter A…
-
A duck for a dog
If you got your own place on the Internet, helping your visitors find what they are looking for is a great way to engage them and keep them staying a bit longer. A custom site search can achieve just …
-
"Might as well have the best"
Aiming for better images? Think better lenses! This is your most important piece of gear, so you better get it sorted out. — Need some advice?


 Become a patron for