Metering modes: How your camera calculates exposure
Metering modes specify how your camera evaluates the available light. If you rely on your camera to determine at least some of exposure elements, you'd rather want to know how it goes about it. This short introduction explains exactly that.
You may want to rotate your phone in order to improve your browsing experience on this site.
Understanding metering modes
All modern cameras, both digital and film, are capable of selective light metering. This means, they base their exposure calculation only on samples of light reflected from the scene, not its whole luminance. Metering modes define how these samples are selected and evaluated.
Multi-zone metering
Most cameras use multi-zone metering as their standard, or default mode. This mode is also known as matrix, evaluative, honeycomb, or segment metering. The idea behind it is to combine measurements from different areas, or zones, of the scene to calculate the final exposure reading. The number of areas being evaluated might vary from several to several hundred depending on camera model. How this combination works exactly, highly depends on manufacturer and camera build. Factors taken into account for every zone might include
- being in or out of focus
- distance from the camera, the autofocus point, or frame centre
- colours and luminance
- selected scene mode, e.g. sunset, portrait or sports
In the end, the workings of the multi-zone metering are mysterious, and its results are hard to predict. If it fails, it might be even difficult to correct by using manual exposure compensation before actually trying it and seeing how it works out – your camera is in control, not you.
Average metering
Average metering analyses the entire scene and balances the readings from its different areas without giving preference to any of them. In its pure form it is rarely found in modern cameras.
A modified variety of average metering, centre-weighted metering concentrates light readings around the centre of the frame and assigns them 60 to 80 percent significance in the final exposure setting. Areas further away from the centre contribute to the measurement in a lesser way. Exposure calculated this way tends to be more precise since all parts of the frame are taken into consideration. At the same time, more important sectors of the image are given due priority.
Average metering and its modifications are easy to work with. If the resulting exposure value isn't optimal you can adjust it simply by dialing in required compensation – the results are always consistent and thus predictable. In my opinion, this is the most useful mode for landscape photography.
 Red island • Scoresby Sund, East Greenland
An example of centre-weighted metering with Hasselblad XPan
Spot metering
Finally, spot metering only takes into account a very small area of the frame, usually between 1-5% around its centre. This is arguably too small to correctly expose a vast landscape scene with high contrast. Partial metering uses the same principle while evaluating a larger portion of the image, usually 10-15%.
Spot metering might be the mode of choice if your subject is well defined, like, say, the face in a portrait image or animal's eyes in wildlife photography. As far as landscape photography is concerned, however, spot metering will inevitably result in over- and/or underexposed areas if the scene features differently lit zones, that is, in most cases. Partial metering, when at all available, can only amend these shortcomings to some extent.
 Metering mode icons of Canon cameras
1 - centre-weighted, 2 - spot, 3 - partial, 4 - matrix
Exercise
What metering mode should you choose? It pretty much depends on the camera at your disposal. Experiment with different modes available in your camera. Try them in different lighting conditions and with different scenes. Can you predict the final look of your image with any of the modes before you press the shutter release? Which one works best for you? Stick to it!
Focus and exposure: Getting all set
There are some situations when you'd want to take exposure reading from a different area than your final frame would imply. For example, you might be using spot metering with a subject off-centre of your frame. In this case you'll need to make your camera remember the exposure while you recompose and press the shutter release. This is exactly what the button AEL is for – its label means "auto-exposure lock".
Note that the exposure value might also get locked when you explicitly set the focus by half-pressing the shutter release. Whether this is the case, is buried somewhere in the settings of your camera. The same is true for the AEL button as well – it can be configured to lock both the exposure and the focus. If you want to keep the things independent from each other, you'll have to ensure the settings are decoupled and your fingers are able to handle both button locks simultaneously.
If manual dexterity isn't your top skill, you might want to opt for manual focus, set it first, and pay attention exclusively to exposure afterwards – with only one button to care about.
Tags: #exposuremetering #cameraexposure #photographylessons
Other articles on camera exposure
- Aperture and depth of field
- Learn what aperture is, and how its different settings can change the look of your images.
- Shutter speed and motion blur
- Learn how exposure time can add dynamic and movement to your images.
- ISO and digital noise
- Learn how photo noise is related to your chosen ISO value.
- Metering modes
- Understand different metering modes and when to use them.
- Exposure compensation and bracketing
- Learn how to overcome shortcomings of your camera's automatic exposure metering.
- The sunny 16 rule and manual exposure
- Measure up to your camera and take exposure in your own hands with this simple and easy to follow rule.
Unattributed images on this page are sourced from Wikimedia Commons.
Tell me what you think!
Is it useful 👍? Awful 👎? Leave a message! Your comments help make this site better (and give me a kick—one way or another).
Popular articles
-
A kind of magic
If a digital picture has to be seen in the real world, printed on a real medium and displayed in a real showcase, its transition from RAW to real is better done in an old school image editor. Enter A…
-
A duck for a dog
If you got your own place on the Internet, helping your visitors find what they are looking for is a great way to engage them and keep them staying a bit longer. A custom site search can achieve just …
-
"Might as well have the best"
Aiming for better images? Think better lenses! This is your most important piece of gear, so you better get it sorted out. — Need some advice?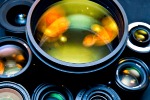
 Become a patron for