Shades of grey: b&w landscape photography
It might come as a surprise, but landscape b&w photography is rather "in" at this time and age of digital all around. The trend is actually noticeable in pretty much every genre, and landscape photography is no exception. The reasons are diverse, some of them being the "classic" look and feel and the strong, pure aesthetics devoid of any distraction, as opposed to oversaturated, unreal colours produced by most camera sensors. Here's to help you create your own exciting black-and-white landscape photography images.

You may want to rotate your phone in order to improve your browsing experience on this site.
Quick link
Black-and-white landscape photography tips
Don't use your camera's b&w mode. If it appears counterintuitive, so be it, but don't rely on your in-camera conversion to greyscale. Like in many other cases mentioned on these pages, the results are highly proprietary and hardly predictable.
Stick to shooting in RAW and convert to black and white in post-processing. Aside from the obvious freedom to choose your own conversion method (more on this further below), you'll have an option to retain colour as well, should your subject prove to look better that way, or in case you just change your mind.
By all means, use your in-camera abilities to get a quick feedback on whether your intended black-and-white shot will possibly look any good. However, do switch back to RAW before springing into action for real.
The matter is more complicated if you shoot film.
I would really like to know if anyone reading these lines still works film.
The "old school" of film photography was always getting the correct image in-camera, during development, or printing, at the latest. Shooting in colour to later scan the image and convert it to black and white would have been unthinkable for legions of film photographers (not that it was possible, either, mind you). However, if you still use film and intend to scan it, doing exactly that – shooting in colour and converting to monochrome after scanning – can save you lots of time as scanning b&w film is very time-consuming and tedious.
The reason for the latter is the inability of scanning software to deal with scratches and dirt on the surface of black-and-white film the same way it is possible with colour film. Once you get to understand you have to do without automatic scratch and dirt removal while scanning your output of several weeks, the idea of shooting next time in colour doesn't sound that absurd anymore. At least, you have the choice.
Choose your subject carefully. Not every subject lends itself well to black and white. When composing, be aware that the colours you see in the viewfinder or on the LCD screen won't be present in the final image. Instead, pay attention to contrast richness, differently lit areas, various kinds of surface materials, etc.

“Maybe black and white is the best medium for landscapes, I don't know.”
Fay Godwin, British photographer
Throw in some colour. Landscape b&w photography has never been just grey. Different toning/tinting methods have been developed over the years to let black and white look a bit fancier, if nothing else. Sepia-, selenium-, and platinum-toned images make a step well beyond being black and white, truly becoming monochrome instead. Of course, you don't have to add tint to any of your black-and-white creations, let alone each and every one. Be sure to experiment, though – you'll never know otherwise.

You even might enjoy letting some colour break through to the surface of your black-and-white photographs. Try using masks in your monochrome layers (see below in Photoshop techniques) to reveal an unexpected dash of colour underneath – to some surprising effect if done unobtrusively.
Converting to black and white in Photoshop
Digital post-processing is a fascinating and very creative area of modern photography. There are different opinions on how much photography the post-processing actually is – and you are entitled to your own – but as long as it's done without excess and looks natural, I am OK with it.
Sometimes I am glad to have the possibilities at hand which were unthinkable of a mere twenty years ago. Converting colour images to monochrome is definitely one I wouldn't want to miss. In fact, there are several ways of doing this.
Converting to greyscale. Converting an image to greyscale is the fastest one. In Photoshop, it's simply choosing Image > Mode > Greyscale and confirming the warning. As you might guess, the simplest isn't necessarily the best. Basically, converting to greyscale desaturates the image. The process leaves colours with similar brightness values looking the same. In many cases this leads to large areas of just so slightly discernible contrast. Besides, it destroys your original image. Take care to save it beforehand to avoid some painful surprises.

Using the Channel Mixer. This is a more advanced – and far less destructive – method of transforming a colour image into a b&w one. In Photoshop, add an adjustment layer to your image and select Channel Mixer as its type. Tick Monochrome. Adjust levels of colour channels to sum up to 100%. Tweak single values until you are happy with the result.
The method is also great to simulate classic photographic filters. E.g., red filter used in the analogous world to darken sky and foliage is effectively "applied" by setting the output of the red channel to 100% and that of both other channels to 0%. Green and blue filters are both "generated" likewise, while yellow and orange filters are mixed from different proportions of red and green channels, with blue channel output set to 0%.
Yellow filter effect is created from 34% red and 66% green, while orange filter is fifty-fifty red/green. You can also choose respective presets from the Channel Mixer's menu in the latest versions of Photoshop.
“There's something really appealing about the simplicity of black-and-white images.”
Joseph Gordon-Levitt, American actor and filmmaker
Black & White adjustment layer. The latest addition to join Photoshop, the Black and White adjustment layer is a powerful version of the Channel Mixer, especially when combined with the On-image adjustment tool.
Add a new adjustment layer and set its type to Black & White. Use panel sliders or On-image ones to control the output for different colour ranges. If desired, add a colour tint to the result.
Lab colour. In my opinion, this is a very effective and satisfying method of discarding colour. The resulting image usually features very fine gradations and often reduced noise levels to boot.
The L*a*b* model is based on the human perception of colour. It describes how a colour looks rather than how it can be reproduced on a specific device. In contrast, the RGB model describes how to mix different colourants to achieve a specific colour. How the resulting colour looks, is often hard to say before the mix is accomplished. Or can you imagine (153, 50, 204) being ?
Three components of the Lab model describe lightness (L), green-red (a), and blue-yellow (b) bias of a colour.
To safely convert an RGB image to black and white using Lab,
- select Image > Mode > Lab
- delete both colour channels, a and b
- convert to greyscale with Image > Mode > Greyscale
- optionally, convert to Duotone for some tinting/toning effect
- convert back to RGB
- copy all (Select All + Copy)
- return to step before converting to Lab in History
- paste your copied image into a new Layer
- continue from there: for example, try different opacity levels and layer merging options

And now for the fun part! Go outside, take some images and experiment with converting them to black and white. It's a truly fascinating process, among the best the digital age can offer to landscape photography.
Tags: #blackandwhitephotography #landscapephotography #phototips
Other photography tips
- Landscape photography composition tips
- Your mastery of photography composition is what ultimately makes your images. Read here how to excel at it in order to engage your viewers!
- Black & white landscape photography
- Black-and-white photography is very much alive, and landscapes in black and white still look as stunning as in Ansel Adams's day. Be sure to check the article if you'd like to try your hand at this classic and fascinating technique.
- Landscape photography equipment essentials
- Looking for a new camera or another piece of gear? Find answers to your questions, along with some advice and recommendations!
- Fine art photography prints
- And now for something completely different… My thoughts and advice on choosing and using fine art photography prints.
- How to photograph waterfalls
- If your waterfall images are not up to the expectations of your friends, nor to your own satisfaction, try these easy to follow tips to make them shine!
- Marketing fine art photography
- This newsletter issue is about creating your brand and marketing your work, told by those who've been there and done exactly that.
- What is legal to photograph outdoors
- Ever thought about copyright laws having two sides? Your photography can violate them, too. Be sure to know what to photograph, where without getting into trouble.
- How to use Photoshop
- In a dedicated newsletter issue, join me as I show how I use Photoshop to edit my images, and learn some funny facts about the application while at it.
- Wildlife photography tips
- No purchase necessary: Learn how to photograph wildlife for best possible results with your usual equipment.
- Art seascapes
- As November closes in, we take Ishmael's, of Moby Dick, advice and get to sea as soon as we can, led by some highly inspirational examples.
- Winter landscape photography tips
- "Winter landscape" may not sound as exciting as, say, "summer beach", not to everybody, for sure. But if it does to you, there is much to discover outdoors in this time of the year, too. Dress warmly and come on outside!
- Best Adobe Photoshop tips
- We recall some Photoshop basics, like layers, and proceed with more advanced topics, like masks, selective channel editing, converting colour to black and white, and output sharpening.
Tell me what you think!
Is it useful 👍? Awful 👎? Leave a message! Your comments help make this site better (and give me a kick—one way or another).
Popular articles
-
A kind of magic
If a digital picture has to be seen in the real world, printed on a real medium and displayed in a real showcase, its transition from RAW to real is better done in an old school image editor. Enter A…
-
A duck for a dog
If you got your own place on the Internet, helping your visitors find what they are looking for is a great way to engage them and keep them staying a bit longer. A custom site search can achieve just …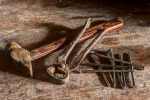
-
"Might as well have the best"
Aiming for better images? Think better lenses! This is your most important piece of gear, so you better get it sorted out. — Need some advice?
 Become a patron for